Image Recognition Applied to City Photos
A CNN for image recognition is trained on results from Google Images API for city names. The array of probabilities provided by a softmax output layer are examined to determine subtle similarities between cities. The plans for a "City Vibes" swiping app are here discussed.
This project originally started as a feature for another app I worked on recently - Best Places to Live. In the third release cycle of our project, I teamed up with an iOS student to build out the feature described here. Fortunately for my partner, he was offered a paid position midway through development. Consequently, the front end of this feature has not yet been completed. Despite this setback, I have included my work on this feature as a stand-alone story in my project. I think the idea is fun, original, and would be fairly straight forward to develop. For the Machine Learning aspects of this project I have a proof of concept, and I have a skeleton outline of database architecture that would make this app function at a production level.
The overall idea of this project is to have a user swipe right or left on random images of cities. If the user likes what they see in the photo, the app should find cities that have photos with similar content. Likewise, the app should shuffle cities with disliked features towards the bottom of the list.
The beauty of using a Neural Network to target cities by random photos is that the patterns it picks up on are subtle. Of the general subject matter in a photo, the NN picks up on lighting, texture, edges, color-scheme, and honestly who knows what else. The patterns are not predetermined, but opaquely found by whatever the NN can pick up on in the photos to optimize its target accuracy. How Google Images bubbles results to the top adds another layer of subtly. The subject of photos in google images for a given keyword are continuously sorted by popular user association. For example, 'New York' generally has grandiose skyline photos towards the top of the stack. 'Denver' tends to feature mountainous backgrounds with rocky crags. 'Los Angeles' has more street view photos.
This duel-layer of subtly, both from the NN and google images automatic sorting, give rise to the potential to access user sub-conscious preference in 'vibes' from a given city photo.
The slightly more technical vision of this project is as follows: train a neural network for image recognition on random photos of cities; have the model output an array of probabilities representing each photo's match to each city; have a user swipe left or right for each random city photo displayed; keep a running score of probable matches for each city per user; output a list of top matched cities for a user based upon images they have swiped.
Steps completed thus far:
- Use a script to pull random Google images into a file system, using city names as keywords.
- Design a CNN optimized for photo recognition, able to access a file system, uses 'city name' as its target, and outputs an array of probabilities.
- Design a database architecture that stores hosted photo URLs with output probability arrays, user running totals data, and a simple model for keeping users' city match scores.
Starting with the end in mind, I first roughly sketched out a plan for a workable data architecture.
The core of the data for this app can be stored in two relatively simple tables. The first table should contain information about each photo: a url to the hosted image; a queue position key value; an array of probabilities for the percentage match to each city. The second table should contain basic user information: their position in the photo queue, and the running match-score for each city. The second table could either live in the Back End or on the user's device.
To complete the core of the app, a very simple model should update user match-score data. This model should take the current user score values and either add or subtract the current user input image array based on included Boolean values. Because of the simplicity of this model, it should live natively in the BE of the app and does not justify a separate DS API. Of course, this model could be greatly improved upon with only slightly more complex arithmetic to calculate the running total, but the general idea is there with just addition and subtraction.
The general flow through this diagram is:
The user initiated the app
- A request is sent to the User Swipe Data table for the queue position
- This key is used to access the next photo in the Photo Info table
- A fresh photo URL is served
- User input, left/right swipe plus PhotoID, is sent to BE model
- Model gets current swipe data and does arithmetic to update running total, updates user data table
- This cycle loops
A separate button for resulting recommendation
- Sends a request to User Swipe Data table
- Model sorts running totals
- Returns a list of top matched cities
The Script (easier than anticipated):
I started small with just nine photos between three cities. I put the photos in folders in the same root directory as my project notebooks. Once I had everything working on this micro-set, I went to work on pulling photos from the Google images API. After some searching, I came upon a fairly simple script that allowed me to download multiple images from google for each city all at once. https://github.com/hardikvasa/google-images-download
With my newly adopted script, I could fill my city folders with as many random city photos as I specified. Again, I took the road of simplicity and only downloaded four photos for each of the 256 cities. Good thing I went small, because it took me several hours to download these with my poor connection.
The CNN:
I decided to force all of my photos to be the same size. Maybe there is another way of doing this, but I figured that the input vectors were all going to need to be the same when they got plugged into the Neural Net. For this I used a prepossessing tool from Keras. Again I started small with a resolution of 224 by 224 by 3 (for colors). I'm not sure if there is any reason for this size exactly, but I found that a lot of instances of Keras use this exact size so I superstitiously followed the apparent convention.
from tensorflow.keras.preprocessing import image
def process_img_path(img_path):
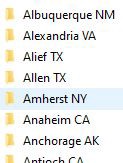
return image.load_img(img_path, target_size=(224, 224))Loading one of my photos to take a look:
image.load_img('./data/santa_fe/sfe1.jpg', target_size=(224,224))
Then I wrote a short function to apply this size requirement to each photo as it adds them as an array of values to a X vector.
data = []

for i in ['columbus', 'portland', 'santa_fe']:
	for file in os.listdir('./data/'+i):
	#         print(file) #to check if right files...
		if file[-3:] == 'jpg':
			path = os.path.join(f'./data/{i}/' + file)
			img = process_img_path(path)
			x = image.img_to_array(img)

			data.append(x)
	#             print(x)
For fun, we can take a peek at our vectorized photos:
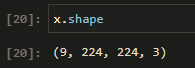
Taking a quick look at the shape of this array, shows us that we have 9 photos, each being 224 by 224 pixels in 3 colors dimensions. Golden. Later the first number became 256 * n, the number of photos hosted per city.
On my first attempt at creating a functional CNN, I created a simple target vector by manually creating an array. Each number represented a city.
y = array([0, 0, 0, 1, 1, 1, 2, 2, 2])For a bigger set of photos, I had to get a little more python savvy:
# Create target vector

y = []
for i in range(0, 256):
j = [i]*4   # in this case 4 photos / city
for p in j:
	y.append(p)
y = np.asarray(y)
Writing something this simple that works is quite satisfying.
y.shape yields:
array([ 0, 0, 0, …, 255, 255, 255])Perfect, except that it needed to be made binary. For this purpose, I used a quick Keras tool.
from keras.utils import to_categorical
y_binary = to_categorical(y)
Now our binary array represents the category, namely the city, as either a 0 or a 1 for each photo. For example, the first three lists within the array start with 1 and the rest are zeros. Each of the first three lists seen are photos of the first city and not any other.
array([[1., 0., 0., ..., 0., 0., 0.],
	[1., 0., 0., ..., 0., 0., 0.],
	[1., 0., 0., ..., 0., 0., 0.],
		...,
	[0., 0., 0., ..., 0., 0., 1.],
	[0., 0., 0., ..., 0., 0., 1.],
	[0., 0., 0., ..., 0., 0., 1.]], dtype=float32)
Next, I split my data into train and test. If I had a much bigger set, I would probably use a train/validate/test split, but this project is primarily a proof of concept. Plus, I can't afford the computational power to run anything much bigger than four photos per city.
from sklearn.model_selection import train_test_split
x_train, x_test, y_train, y_test = train_test_split(x, y_binary, test_size=0.25, stratify=y_binary)
In my "bigger" set with four photos for each 256 cities, I used three pictures to train and one to test. Admittedly, this is not even remotely close to producing something that could be proven accurate, but that's not really the point of this project.
I had a method for clearly defining my X and y vectors, now I needed to work out a model.
I wanted to create a neural network that could take in my array of photos, use each city as a target, and output an array of probabilities that indicated how likely each photo was taken of each city.
After a lot of searching and digging, I found a number of very helpful articles on building NNs with Keras from Jason Browlee -- my current hero. Check out: Deep Learning with Keras, J Brownlee. Seriously, this guy is fantastic!
I also found some helpful information about how to get probabilities from a Neural Network using a softmax output layer and a categorical cross-entropy loss function from Haihan Lan -- here . This was the missing link I needed to change the output of a neural network to an array of probabilities as I was hoping for.
After learning from these masters in my field, building my CNN model with a softmax output layer looks deceptively simple:
from tensorflow.keras.layers import Dense, Conv2D, MaxPooling2D, Flatten, GlobalAveragePooling2D
from tensorflow.keras.applications.resnet50 import ResNet50
from tensorflow.keras.models import Sequential, Model

#instantiate resnet50 & sew own a head -- input layer shape
res = ResNet50(input_shape=(224, 224, 3), weights='imagenet', include_top=False)

# sew my tail on this beast
x1 = res.output
x1 = GlobalAveragePooling2D()(x1)
predictions = Dense(y_train[0].shape[0], activation='softmax')(x1)
model = Model(res.input, predictions)
Above, I've taken the beastly Resnet50 deep NN and simply Frankensteined on my own input and output layers. I'm not going to pretend that I understand how Resnet's layer structure was dreamed up. However, I think it's worth taking a moment to appreciate what's under the hood on this model - prepare to scroll a ways. My model layers can be inspected using, model.summary:
For the sake of readiblity, I put the model layer summary on its own page.
If you dared navigate to the model summary, you'll know: it's a beast. You may have noticed on the last couple lines: over 24 million parameters, over a half million of which are trainable! Mind boggling.
It feels a bit like cheating to add just a half-dozen lines of code to repurpose it. The fifty layers of ResNet50 have been trained on millions of photos to identify all sorts of objects. Perhaps targeting cities captured in pictures is a wildly different affair, but it seems like a good place to start for picking up on subtle content of photos.
- Michael Curry
- Data Scientist